Showing posts with label dessert. Show all posts

Monday, October 1, 2012

Cranberry Swirl Cheesecake

First and foremost, allow me to apologize for not having step-by-step instructions for this recipe.  You see, I have for the last two years made this recipe for Christmas dessert; and I am always so overwhelmed that I rarely have time to capture step-by-step photos for anything that I am making.  This past year I managed to get a couple of recipes completely photographed, but this was not one of them.  I did, however, manage to get a photo of the final product.  My intention was to wait until this year and try again, but upon further reflection I really wanted to share this recipe well before November and December for those early planners out there. 

This recipe originally appeared in the December 2010 Cooking Light Magazine.  The original recipe called for a raspberry liqueur to be mixed into the topping.  As I am always looking to reduced the calories in all my recipes, I replaced this with a high quality cranberry juice.  I love out-lighting Cooking Light! I also chose to go with a standard graham cracker crust instead of the called for chocolate graham cracker crust because I really prefer a classic crust on a cheese cake.  

The Ingredients
Crust
4 ounces low-fat plain graham crackers
3 tablespoons unsalted butter. melted
cooking spray

Topping
1 1/2 cups fresh cranberries
1/2 cup sugar
1/4 cup cranberry juice
3 tablespoons sugar

Cheesecake
1 cup sugar
2 8-ounce packages block-style 1/3 less-fat cream-cheese, softened
4-ounces block-style fat-free cream cheese, softened
1 cup plain fat-free Greek yogurt
2 teaspoons vanilla extract
1/8 teaspoon salt
3 large eggs
2 large egg whites


  1. Preheat the oven to 375° 
  2. Wrap the outsides and bottom of a 9-inch springform pan with a double layer of heavy-duty foil.  Spray the inside the springform pan with cooking spray until well coated.
  3. Place the graham crackers in a food processor; process until finely ground.  Drizzle the melted butter into the opening of the food processor while it continues to run, until the mixture is combined.  Press the mixture into bottom and 1/2-inch up the sides of the prepared springform pan.  
  4. Bake the crust at 375° for 8 minutes; cool completely on a wire rake.  
  5. Reduce the temperature on the oven to 325°
  6. Place the cranberries, 1/2 cup sugar, cranberry juice, and water in a saucepan, and bring to a boil.  Cook for 8 minutes or until the the cranberries pop and the mixture is syrupy.  Cool 20 minutes. 
  7. Combine 1 cup of sugar and the cream cheeses in a large bowl; and beat with a mixer (or use a stand mixer) at medium speed until smooth.  Beat in one at a time the yogurt, the vanilla and the salt.  Add the whole eggs one at a time, beating well after each addition.  
  8. Place the 2 egg whites into a bowl and beat them with a mixer until (if you used a stand mixer for the step above and don't have a stand mixer you will need to remove the cheese mixer and thoroughly clean the bowl of the stand mixer before doing this step---just buy a hand held mixer--it's easier) soft peaks are formed.  Gently, very gently fold the egg white into the cheese mixture.  Do not over mix, or you will lose that lift that the egg whites bring to this recipe.  
  9. Pour the mixture into the crust.  Spoon the cranberry mixture (like dots) over the top of the cream cheese mixture and then use a knife to swirl the cranberries around the top of the cheesecake.  
  10. Place the springform pan a large rectangular baking dish (large enough to hold your foil covered springform pan--test this out in advance).  Add hot water to the pan to a depth of 2 inches.  
  11. Bake at 325° for 50 minutes to an hour or until the center of the cheesecake barely moves when the pan is touched.  
  12. Turn oven off.  Cool the cheesecake in the closed oven for 30 minutes.  
  13. Remove the cheesecake from the oven, and run a knife around the outside edge.  Cool on a wire rack.  Cover and chill for 8 hours.  

Recipe Source: December 2010 issue of Cooking Light Magazine

Serves 12.  Cut the cake into 12 even servings

Calories 270
Protein 7 grams
Fat 11 grams
Sodium 253
Fiber 1
Potassium 54


Friday, September 7, 2012

Peach Crumble

After making the Plum Crumble I decided to make a Peach Crumble just like the one that Martha Stewart had on her site, because Marta is fabulous. 


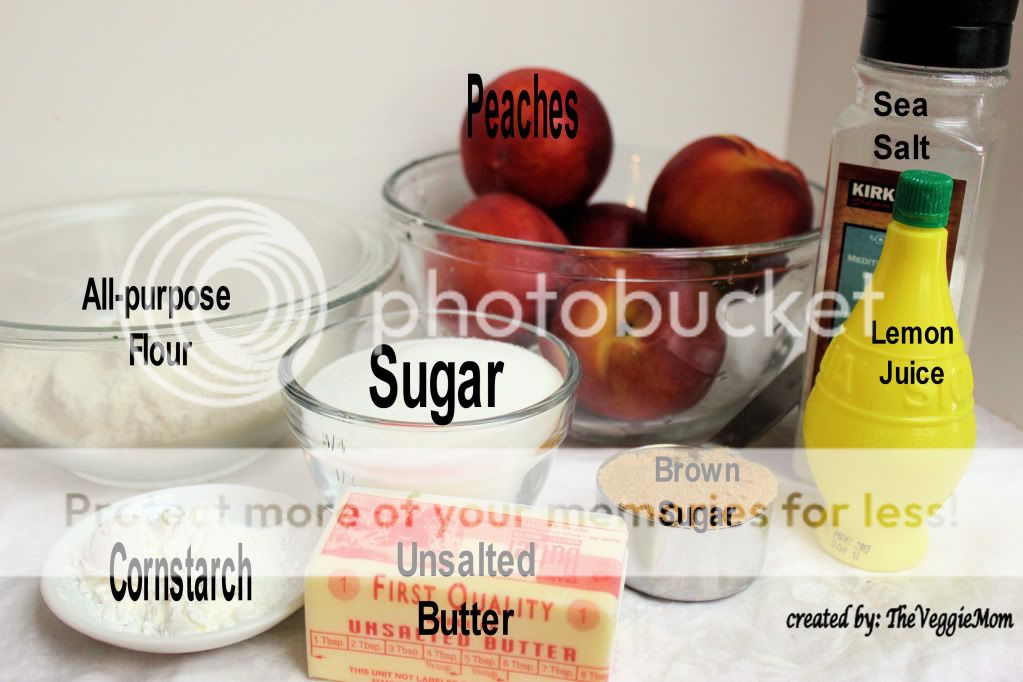
 Ingredients for the Filling
2 pounds of peaches, peeled, pitted and quatered
3/4 cup white sugar
1 tablespoon lemon juice
4 teaspoons cornstarch

Ingredients for the Topping
6 tablespoons unsalted butter, room temperature
1/4 light brown sugar
1 cup all-purpose flour
1/2 teaspoon sea salt

To make the filling add the sugar to the peaches

Add the lemon juice

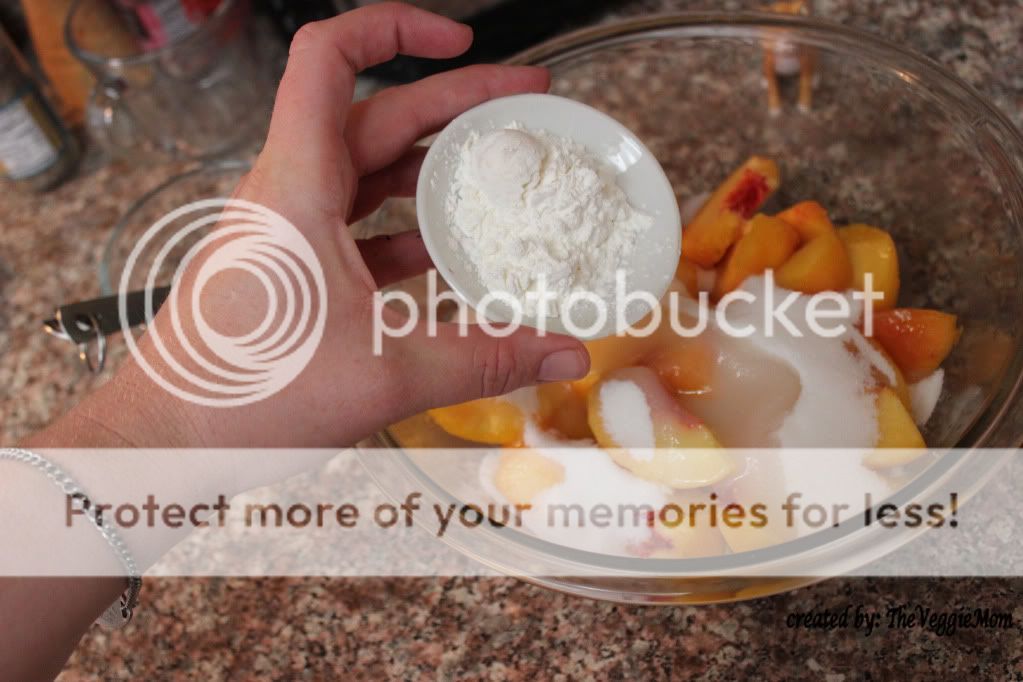
Add the cornstarch

Mix it all together

And pour the filling into your baking dish.  I chose to use a 9-inch pie plate because it's pretty.

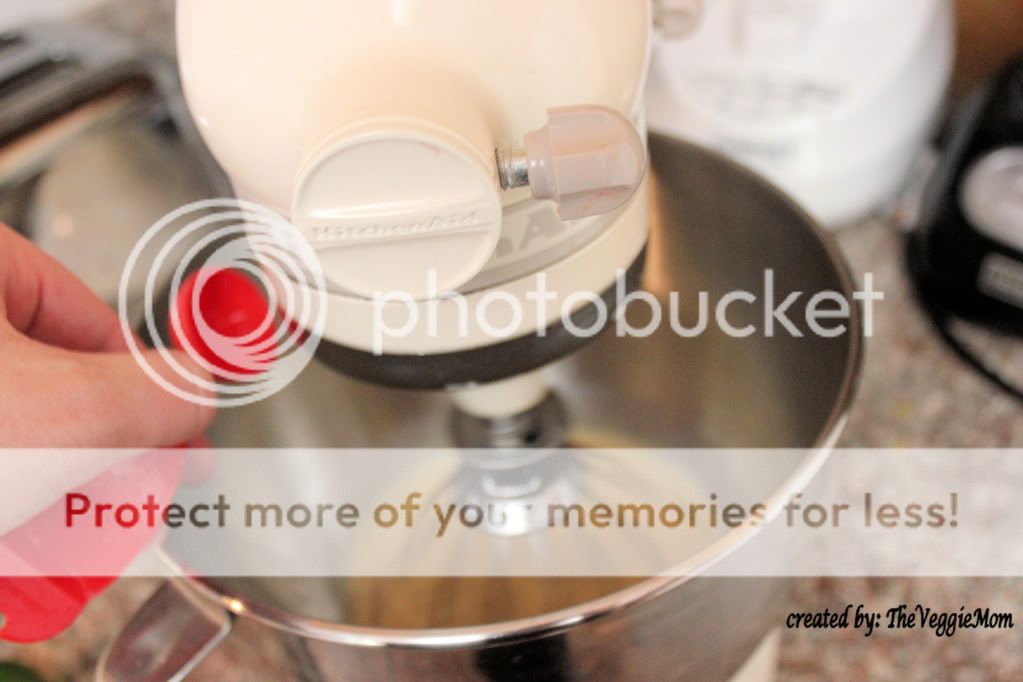
Preheat the oven to 375° while you make the topping.  In a stand mixer combine the butter and brown sugar on medium until light and fluffy. 

Add the flour and salt

Mix with your clean hand to combine

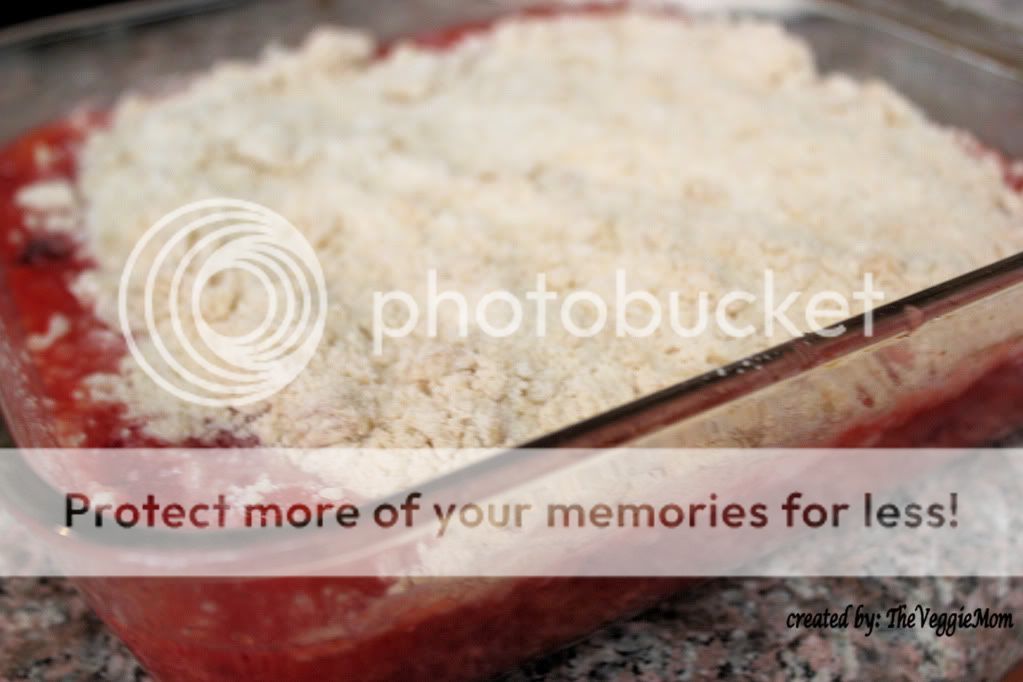
Place the crumble on top of the peach filling, and bake for 40-50 minuted or until the top is a golden brown and the filling is bubbling.

 Let the crumble cool for 20 minutes before serving


Recipe source: marthastewart.com


Monday, August 27, 2012

Plum Crumble

I should have added to my, why I have not been blogging list, that I spent the entire months of June and July picking up plums of the damn ground, and also plucking them from the tree. I estimate that I collected at least 12 thousand tons of plums from both the tree and the ground (hyperbole warning).

I had planned to purchase and use a ice cream maker to make ice cream from my plums (and apricots), but you need money to buy stuff now a days and the Veggie Mom is sadly too broke at the moment for kitchen purchases.  So, I went to Martha Stewart for inspiration and I came back with this crumble recipe. I changed on the fruit used as Martha's recipes are supremely vetted and always delicious.

The Ingredients

The Filling 
2lbs plums, peeled, pitted and cut into halves
3/4 cup sugar
1 tablespoon lemon juice
4 teaspoons cornstarch

The Crumble
6 tablespoons unsalted butter, room temperature
1/4 brown sugar
1 cup all-purpose flour
1/2 teaspoon sea salt

 Preheat the oven to 375 degrees and combine the plums, white sugar, cornstarch, and lemon juice in a medium sized glass bowl

In the bowl of a stand mixer combine the butter and brown sugar on medium until light and fluffy.

 Add the flour and sea salt to the butter mixture

 Using your hand lightly kneed together the dough

Sprinkle the crumble mixture over the plums and bake for 40-50 minutes or until center is bubbling.  Tent loosely with foil and allow to cool for 20 minutes.  Serve with ice cream!

Recipe source: MarthaStewart.com

Thursday, June 28, 2012

Margarita Ice Box Pie

I have wanted for some time to make a Margarita flavored ice box pie.  I needed a salty base and I did that with the salty Pretzel Crust (see yesterday's post). Next I need the lime, that was no issue, lime juice did the trick.  The lime was sweetened up easily with condensed milk, but then there was the question of the tequila.  I mulled it over some time as to whether or not I should add tequila flavoring or actual tequila.  In the end I went with a small amount tequila.  I figured that it would not be enough to get the kids drunk and I wanted that flavor to add to the overall margarita feel of the pie.

I will be including the calories at the end of the recipe, but please sit down before you look.  No, really.  Sit down.  It's shocking, but in moderation totally doable.  I had this pie a couple of times the week of father's day, and I still lost weight.


The Ingredients


1 pretzel crust
1 14-ounce can of sweetened condense milk
1/2 cup lime juice
2 tablespoons tequila
1 8-ounce package of whipped topping, thawed but kept refrigerated
lime (for pie beautification)

The Tools
stand mixer or electric mixer
spoonula or scraper

The Cooking or Rather the Mixing and Chilling


On a slow speed combine the sweetened condensed milk and lime juice

Add the tequila.  Don't forget to taste the tequila first and after and several hours later.

Gently fold in the whipped topping.  Now, you could use homemade whipped cream in this step.  Just make about 2 cups worth.

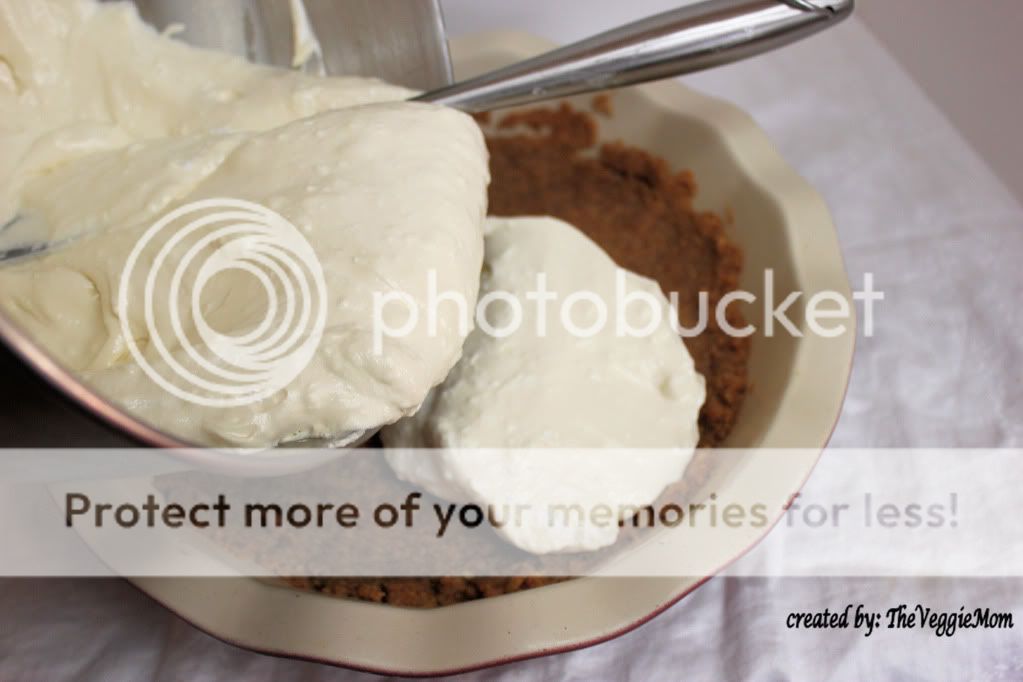
Pour the filling into the crust.  You will notice that the filling is not lime green in color.  I could have added some food coloring to make it green, but I chose not to do so.

Place the pie in the freezer and allow it to freeze/cool for about 2 hours.  Take it out of the freezer about 15 minutes before you cut it.


Recipe source: My Brain


The recipe serves 8 even slices.  Calories are per slice

Calories: 615 (aren't you glad you sat down)
Protein: 8 grams
Fat: 24 grams
Sodium: 971 mg
Fiber: 2
Potassium: 160


Tuesday, June 26, 2012

Pretzel Crust

For some time now I have been plotting to make a Margarita Ice Box pie.  I've shared my Fresh Strawberry Ice Box Pie before, and I've been playing with the idea of a Margarita Ice Box Pie ever since.  I wanted the crust to be the salty taste that one would get from a Margarita in a salted glass.  I considered a graham cracker crust with salt, but I didn't want to have to add too much salt.  So, I decided to try making a crust with pretzels and adding sugar to the pretzels.  

While I used this crust with the Margarita Ice Box Pie, it would work really well with any number of pies or brownies.  It would work really well with a chocolate or caramel pie.  

The Ingredients
2 cups salted pretzels
1/4 cups light brown sugar
3/4 cups melted unsalted butter

The Tools
food processor
9-inch pie plate

The Cooking
 Process the pretzels and light brown sugar together.  While the food processor does its thing, preheat the oven to 350 degrees and spray the bottom of a 9-inch pie plate if you feel your pie plate requires the assistance. 

When completely crushed the pretzels will be a combination of large and small crumbs.  

With the food processor turned on, slowly pour the melted butter in with the sweetened pretzel crumbs, until the butter pulls the crumbs together.  

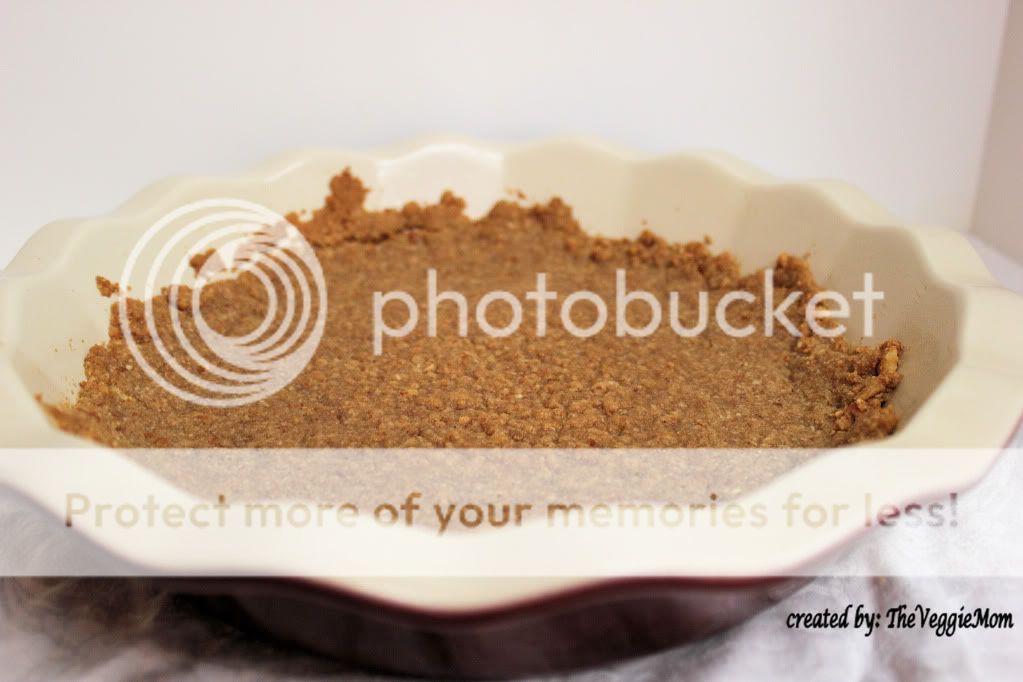
Press the crust into the bottom of a pie plate and up the sides.  Bake for 15 or 20 minutes or until the crust has brown a bit and it firm to the touch.  

Allow the pie to cool completely before adding the filing. 


Recipe Source: My Brain


I did not separately calculate the calories for the crust.  The calories for the crust will be included in the pie recipe to follow. 


Thursday, November 17, 2011

Salty Rice Crispy Treats


This time of the year there are always Rice Crispy Treat commercials.  They always show a happy family making their big batch of rice crispy treats.  While I busy thinking, 'All happy families are alike; every unhappy family is unhappy in its own way.', my kids are busy begging to get the needed ingredients immediately.  Let's assume for now that my family and those TV families fall into the happy family category, at least when it comes to rice crispy treats. 

Off to the store we trek, with visions of rice crispy treats, giggling children and beautiful spacious kitchens with an island in our heads (right, if I make these treats, my kitchen will transform, right?).  We collect our ingredients and 24 other things we probably don't need because we are at Target anyway and we head home.  Bouncing off the walls my kids demand we start the rice crispy treat ritual as soon as stumble through the door.  In all  fairness, I am the one stumbling as I am the one carrying all the groceries, five bags up each arm, because heavens forbid I make two trips.  My kids, while not stumbling are jumping up and down like  pair of humming birds on crack.  I unpack, I put away, I get all things rice crispy treat sorted out, and the minute the stove turns on the kids disappear.  Because, well mommy has been very adamant in the past, that they stay away from the stove.  Of coure the melting stage does not take long and we are on the stirring phase, cue children to reappear.  We stir and we stir.  And voila! We have rice crispy treats.  The children quickly note, that when left alone I have done something different to the treats.  I messed with the ritual, but I have made them better!  Quite simply I added pink Himalayan salt.  There is was just sitting there next to the stove as I stirred the pot alone.  The pink salt did not abandon me.  The pink salt stay when things got a little hot. The pink salt DESERVED to be included in the treats. 

Here is where I note that I did not get a photos of ingredients for this meal. I am getting better with this step by step thing, I promise. 

Ingredients
2 tablespoons unsalted butter
1 package large marshmallows
5 turns of a pink Himalayan salt mill
6 cups rice crispy cereal


Melt the butter in a large sauce pan, and add the marshmallows.  Stir as the marshmallows melt and continue stirring until the marshmallows are completely melted.  Remove the marshmallows from the stove and add the rice crispy cereal.  I would have taken photos of this step, but the bowl was hidden behind too happy, giggling, and rice crispy treat crazed boys.  Press the rice crispiess into a greased 9x13 inch baking dish and allow to sit for as long as you can stay out of them and then cut them into the shapes of you choice.  

Wednesday, July 13, 2011

Flan


This was another request from the Veggie Dad for his Father's Day meal.  I had never made flan and I don't lie to you.  I was very nervous as the prospect.  I chose to do the flan in a large pie plate instead of doing it in indivual ramekins.  I did this primarily because I only own 4 ramekins.  If you desire to to these as indiviual servings you would need 6 rameskins.  This recipe is a combination of several that I found online. 

1 cup sugar, divided
1/4 cup water
2 cups whole milk
4 large eggs
1 teaspoon vanilla extract

  1. Preheat the oven to 350 degrees.  Stir 1/2 cup sugar and 1/4 cup water in a small heavy saucepan, over low heat until the sugar dissolves.  Increase the heat just a little bit, and boil without stirring until the syrup is a deep amber color, brushing down the sides of the pan with a wet pastry brush and swirly the pan occasionally.  It helps if you use a lighter color pan, as if is often hard to tell when that amber color is achieved in a dark colored pan.  Pour the caramel into your serving dish(es).  Working quickly, tilt the serving dish(es), to coat the bottom(s) and side(s). 
  2. Stir the milk and 1/2 cup in a medium saucepan over low heat until the sugar dissolves (the milk will be lukewarm).  Whisk eggs in a medium bowl until blended.  Slowly whisk the eggs into the milk mixture.  Whisk in the vanilla.  Strain the custard into the serving dish(es). 
  3. Arrange the serving dish(es) in a metal baking pan.  Pour enough hot water into the baking pan until the water is half way up the side of the flan dish.  Bake the flan for 50 minutes.  Remove the serving dish from the water and let stand for 30 minutes.  Chill until cold for at least 4 hours, or up to 1 day. 
  4. Cut around the edge of the flan and turn out onto a serving plate. 

Thursday, June 9, 2011

Makos Dios (Hungarian Poppy Seed Roll)

In preparation for this year's Cultural Night at the boys' school my husband suggested I make Makos Dios. He could describe this dish, but had no idea how to spell it.  My phonetic spelling did not even come close, so I had to search based on the description.  I found multiple recipes which used a poppy seed or walnut filling for the sweet bread.  I opted to just to the poppy seed filling, as the boys' school request the dishes for Cultural night be nut free. I combined several recipes to make mine and in the end used my own technique for kneading/rising the dough.  I made one major mistake in baking this recipe.  I place all four rolls onto the same baking sheet.  This resulted in a four slightly connected baked rolls.  They still tasted delicious, but they looked a little rough.  When I make this again, I will split them up and back them separately on two baking sheets.

Poppy Seed Filling
4 ounces poppy seeds, ground finely (I used a coffee grinder for this)
4 ounces raisins
1 cup milk
1 1/4 cups sugar
2 eggs
Zest of 2 lemons

Dough
Yeast Proofing/Starter
2 1/4 ounce packet active dry yeast
1 cup lukewarm water (about 100 degrees)
2 tablespoons sugar

Sweet Dough
4 1/2 to 4 3/4 cups all purpose flour
1/2 tablespoon salt
4 tablespoons sugar
1 cup cold unsalted butter, cut into cubes
2 egg yolks (save the whites)
1/2 cup sour cream
  1. For the filling: Place all the ingredients for the filling in a heavy bottomed saucepan, and heat to a boil over medium-low heat.  You must stir the mixture constantly until the boil is achieved, this should take about 20 minutes.  The mixture will thicken as you stir.  Pour the mixture into a heatproof bowl and place it in the oven to cool.  I cooled mine overnight. 
  2. For the Dough: In a small bowl, mix together the yeast, water and 2 tablespoons of sugar.  Set aside and allow the yeast to proof.  This should take about 5 minutes and you will know it is complete when the mixture looks frothy. 
  3. Preheat the oven to 200 degrees and once the oven comes up to temp, turn it off. This creates the perfect place to rise any dough
  4. In the bowl of a stand mixer(the bowl is off the mixer at this point) combine the flour, salt, and sugar with a whisk. Add the cold butter and combine with a pasty cutter, two forks or your fingers.  Return the bowl to the stand mixer, to the flour mixture add the eggs, the sour cream and the yeast mixture.  On low speed knead the dough until it forms a nice smooth ball. 
  5. Transfer the dough to a lightly greased metal bowl and cover it with plastic wrap.  Place the dough in the warmed, yet turned off oven for 1 to 1 1/2 hours. The dough should double in size.
  6. Once the dough as risen, separate it into four discs, and allow them to rest for 20 minutes. 
  7. On a floured surface, roll out each disc into a circle, fold the circle into a square.  With the dough now in a square shape, roll it out into a 12x12 inch square.  To this add some of poppy seed filling leaving an inch clearance on one side and roll up the dough and filling like a cake roll.  Pinch the ends shut and place the roll seem side down on a parchment paper covered baking sheet.  Repeat until all four rolls are done with two rolls each on a baking sheet.  Allow the rolls to rise again for 1 hour.  Preheat the oven to 350 degree while this second rising is occurring. 
  8. Brush the tops of the rolls with the left over beaten egg whites.  Bake each cookie sheet  for 20-35 minutes or until the rolls are golden brown.  Remove from the oven and allow the rolls to cool on the baking sheet for 10 minutes.  Transfer them to a wire rack to completely cool.  Do not cut the rolls until they are completely cooled. 

Thursday, April 28, 2011

Fruit Bread Pudding

This recipe is from What Cooking? Vegetarian.  I have wanted to try and make this for some time, but I just never got around to it.  For Easter this year I wanted to make a fruit based dessert, but I really did not want to deal with dough.  Luckily I remember this recipe.  I changed the fruit used, but the main recipe is very close to that in the cookbook. 

1 cup blueberries
1 cup blackberries
1 apple, cored, peeled and chopped
1 pear, cored, peeled and chopped
3/4 cup light brown sugar
1 teaspoon cinnamon
7 tablespoons water
8 ounces white bread, thinly sliced with crusts removed
  1. Place the fruit in a large saucepan with the brown sugar, cinnamon and water.  Stir and bring to a boil.  Reduce the heat and simmer for 5 to 10 minutes or until the fruit is tender but retains its shape
  2. Meanwhile, line the base and sides of a 4 cup glass bowl. with the bread slices, ensuring that there are no gaps between the pieces of bread. 
  3. Spoon the fruit onto the center of the bread lined bowl, and cover the fruit with the remaining bread.  Place a saucer on top of the bread and weight it down.  Refrigerate overnight. 
  4. Turn the pudding out onto a serving dish.  Serve at once with home made whipped cream or vanilla ice cream. Or use vegan toppings in place of the whipped cream and ice cream. 

Tuesday, January 4, 2011

Microwave Peanut Brittle


This recipe came to me via my dad, in fact the photo above is the brittle he made and sent to use with our Christmas gifts. The recipe originated with Ora Rainey of Marietta, GA. I want to make one note, Ms. Rainey's original recipe calls for 1 teaspoon of baking soda, but my Uncle Billy says that a little more will make it better. I have not tested this theory yet, but Uncle Billy lives in Albany, GA and is considered the family authority on peanuts. You may also need to reduce you cooking temperature if you have a higher power microwave.
1 1/2 cups raw peanuts, shelled
1 cup sugar
1/2 cup light corn syrup
1/8 teaspoon salt
1 tablespoon unsalted butter or margarine
1 teaspoon vanilla
1 to 1 1/2 teaspoons baking soda
  1. Place the peanuts, sugar, corn syrup, and salt in a quart size microwave dish and microwave on high for 7 minutes.
  2. Stir in the butter and vanilla and return dish to the microwave and cook on high for 3 more minutes.
  3. Add the baking soda and pour the mixture out onto a butter flat baking sheet. Loosen from the baking sheet. When it cools completely, break into small pieces.

Calories per ounce: 110

Tuesday, December 7, 2010

Carrot Cake

This is my mom's Carrot Cake recipe. I have no idea were it might have come from. It is a pretty standard recipe. I like to serve this away from home and not bring any back. So far, so good!

Cake
2 1/2 cups all purpose flour
1 teaspoon salt
2 cups sugar
2 teaspoons baking soda
2 teaspoons ground cinnamon
4 eggs
3 cups grated carrots, pressed dry
1 1/2 cups vegetable oil

Icing
8 ounces cream cheese
2 teaspoons vanilla
1 stick of unsalted butter, softened
1 box of powdered sugar


  1. Preheat the oven to 350°. Grease and flour, two 9 inch round cake pans. Sift together the flour, salt, sugar, soda and cinnamon. Add the eggs, carrots and oil and stir until well combined.
  2. Bake for 35 minutes or until done. Remove from oven and allow to cool on a rack for 30 minutes. Remove the cakes from their pans and allow to cool completely.
  3. For the frosting: cream the cream cheese and butter together until smooth. Add the vanilla. Then slowly add the powdered sugar and stir until well combined.
  4. Once the cake is cooled, place it on your serving place and frost.

Monday, November 22, 2010

Pumpkin Cheesecake

This recipe was originally posted last December. It will be just as delicious for Thanksgiving dessert as it was for our Christmas dessert last year.

Crust
3/4 cup graham crackers crumbs
1/2 cup ginger snap crumbs
2 tablespoons brown sugar
2 tablespoons white sugar
1/4 cup butter, melted

Filling
1 cup sugar, divided
3/4 cup pureed pumpkin (not pumpkin pie filling)
4 egg yolks
1 whole egg
1 1/2 teaspoon ground cinnamon
1/2 teaspoon ground ginger
1/4 teaspoon ground nutmeg
1/4 teaspoon allspice
1/4 teaspoon ground cloves
1/4 teaspoon salt
3-8 oz packages 1/3 less fat cream cheese
2 tablespoons heavy whipping cream
1 tablespoon cornstarch
1/2 teaspoon vanilla extract
1/2 teaspoon lemon extract
  1. Move oven rack to the middle position and preheat oven to 350°. Grease the bottom of your 9 inch springform pan. Check now to be certain that the side latch is firmly in place. Wrap the bottom of your springform pan in aluminum foil if you plan on using a water bath.
  2. Combine the cracker and cookie crumbs, 2 tablespoons white sugar, 2 tablespoons brown sugar and butter together. Mix until well combined. Press firmly and evenly into the prepared spring form pan.
  3. Combine 3/4 cup of white sugar, the pumpkin puree, 3 egg yolks, spices, and salt in a medium bowl. Mix until well combined and set aside.
  4. Beat the cream cheese with an mixer (stand or hand) until light and fluffy, about 5-10 minutes. With your mixer going, gradually add the additional 1/4 cup of sugar and mix well. Add the whole egg, the remaining egg yolk and the cream one item at a time and beat until well combined. Add the cornstarch, vanilla and lemon extracts and mix well. Last, add in the pumpkin mixture and mix well until completely combined.
  5. Pour into the prepared pan. If you wish to use a water bath pour some water into a larger baking pan and set your spring form pan into that bath of water.
  6. Bake the cheesecake for 1 hour or until golden brown on top.

Wednesday, September 15, 2010

Light Strawberry Ice Box Pie


This recipe is often referred to a the Jello Pie. It has been passed around weight watchers meetings for year. I thought if frozen a little it took on the qualities of an ice box pie for a fraction of the calories.
1 Ready Crust Reduced Fat Graham Cracker Pie Crust
1 (4 serving size) package of sugar-free strawberry jello
1/4 cup boiling water
2 (6 ounce) containers strawberry flavor light yogurt
1 tub of fat free whipped topping, thawed
  1. In a large heat proof bowl, dissolve the jello in the boiling water. Stir in the yogurt with a wire whisk until completely combined. Fold in the thawed whipped topping with a spoontula.
  2. Spread into the crust. Freeze for about 1 hour. Move from the freezer to the refridgerator until able to cut.
  3. Enjoy!

Serves 8 slices. Calories 185, Fat 4 grams

Wednesday, July 14, 2010

Mounds Bar Cake


Last month my book club read the book, Fallen by Lauren Kate. Not going to go into details on the book, but it deal with sins, demons and angels. So as the host of the book club meeting I wanted to make a very sinfully delicious chocolate cake. During my searching I came across this recipe on Recipezaar.com. I liked that could adapt the cake to actually look like a Mounds Bar. I have to be honest and admit that the book club ladies did not like the book or the cake. One must be sure to always ask how people feel about coconut. I cannot imagine NOT liking coconut, but apparently the condition exists. I however had nothing do with picking that horrible book. Really it was awful.

Cake
1 (16 ounce) box of devil's food cake mix
1 (3 1/2 ounce) package instant chocolate pudding mix
1/2 cup oil
1/2 cup Kahlua
3/4 cup water
3 eggs

Frosting
8 ounces dark chocolate ( I used a combination of 73% cacao and 80% cacao bars)
4 ounces heavy whipping cream

Filling
1/2 cup sugar
1/4 cup cornstarch
1 pinch of salt
1 (13 1/2 ounce) coconut milk
4 1/4 ounces Cream de Coconut (like for a pina colada)
4 cups shredded coconut
  1. Move oven rack to the lower middle position and preheat the oven to 350°.
  2. Mix all the cake ingredients in a bowl, mix on low for 1 minute to combine. Scrape the bowl and then mix on medium speed for a full 3 minutes to make it like and fluffy.
  3. Spray a tube pan or bundt pan with cooking spray. Pour the batter into the pan and back for 45 minutes or until done.
  4. Let cool in pan for about 15 minutes and then turn out onto your serving platter. While the cake is cooling, make the filling and frosting. The cake must be completely cool before your proceed.
  5. Chop the chocolate and place it in a heatproof bowl.
  6. Heat the cream in a small saucepan over medium heat until it starts to boil. As soon as it starts to bubble, take it off the heat and pour it over the chocolate. Stir immediately with a whisk to incorporate the cream into the chocolate. Stir until the chocolate is completely melted and set aside to cool. It will need to set until it is a spreading consistency.
  7. For the topping: combine the sugar, cornstarch, and salt in a heavy saucepan. Add the coconut milk and cream de coconut. Heat on medium heat and stir until smooth and starting to boil. Continue stirring until it thickens, about 5-7 minutes.
  8. Take the pan off the heat and pour the mixture into a large bowl and add the shredded coconut. Stir to combine until the mixture resembles the filling in a Mounds Bar. Let this cool completely.
  9. Once everything has cooled completely. Use the coconut filling to fill the hole in the cake left by the bundt pan. Then add a layer to the top to even out peaks of the cake. Get this as smooth as possible.
  10. Cover the cake with the chocolate bar frosting. It will be a bit runny, but will smooth out nicely. Once the cake it topped with the chocolate, put it in the refrigerator of set up, so that it looks like a candy bar.
  11. Enjoy and be sure to ask your guest in advance how they feel about coconut.

Friday, June 25, 2010

Fresh Strawberry Ice Box Pie

I was inspired to make this pie after eating a Strawberry Ice Box Pie at Cracker Barrel when I was back in Georgia a couple of weeks ago. I could find no recipe that matched up to what they served at the restaurant, so I took a little bit to this and that from several Lemon Ice Box pie recipes to get what I wanted. This is the result. Please note, that I will never show a photo of a slice of any pie I make. This is not because the pie does not taste good, this is because I cannot get a piece of pie out of the pie plate without wrecking its good looks.

9 plain graham crackers
5 tablespoons unsalted butter, melted
2 lbs fresh ripe strawberries, hulled
2 teaspoons sugar
1 (14 ounce) can of sweetened condensed milk
8 ounces frozen whipped topping, thawed
  1. Pulse the graham crackers in a food processor until they are find crumbs. Add the melted butter through the top of the food processor until the mixture becomes very sticky. Press the graham cracker mixture into the bottom and up the sides of a 9-inch pie plate and set aside.
  2. Dice about 3/4 of the hulled strawberries. Take about half of what was diced and place them in a blender with 2 teaspoons of sugar and blend until liquefied. You should have about 1/2 cup of strawberry puree. Slice the remaining strawberries for the top of the pie.
  3. Using a hand held mixer, mix the condensed milk and strawberry puree together on high until well incorporated.
  4. Using a spoontula, fold in 1/3 of the whipped topping to the condensed milk mixture. Then fold in the remaining diced strawberries.
  5. Pour this mixture into the prepared pie crust and top with the remaining whipped topping
    and the sliced strawberries.
  6. Cover the pie with cling wrap and place it in the freezer for at least 6 hours.
  7. Remove from the freezer about 30 minutes before serving.
  8. Enjoy!

Wednesday, June 16, 2010

Toasty Coconut Cream Pie

This recipe is loosely based on a recipe in a Weight Watchers Cookbook. I had to change direction with this on pretty early on. I must say that I wonder how much testing they do on these recipes before they publish them.

Crust
1 cup ground low fat graham crackers
1 1/2 tablespoons unsalted butter, melted

Filling
1 envelope unflavored gelatin
1/4 cup cold water
1/4 cup sugar
3 tablespoons all-purpose flour
1 cup low-fat (1 %) milk
1/2 cup light coconut milk
1 large egg
pinch of salt
1 teaspoon coconut extract
1/2 cup frozen light whipped topping, thawed

Topping
1 1/2 cups frozen light whipped topping, thawed
1/4 cup toasted walnuts, chopped
3 tablespoons toasted coconut
  1. For the crust, combine the graham crackers and melted butter and press the mixture into the bottom and up the sides of a pie plate. Bake at 375° or until set, about 12 minutes. Cool completely.
  2. For the filling, sprinkle the gelatin over water in a microwavable cup. Let stand until softened(about 3 minutes) and then microwave on high until the gelatin is completely dissolved, about 15 seconds.
  3. Whisk together the sugar and flour in a medium saucepan. Whisk in the milk, coconut milk, egg and salt over medium high heat. Cook, stirring constantly until the mixture thickens, about 4 minutes(do not boil). Remove from the heat and add the gelatin mixture and the coconut extract. Pour into a medium bowl and refrigerate until filling begins to set, anywhere from 30 to 60 minutes. Remove from the refrigerator and whisk until smooth and creamy. With a rubber spatula gently fold in the 1/2 cup of whipped topping. Pour into the crust and refrigerate over night.
  4. Top with an additional 1 1/2 cups of whipped topping and toasted walnuts and coconut.
  5. Enjoy.

Thursday, March 25, 2010

Baklava

2 cups sugar
1 1/2 cups water
2 tablespoons honey
2 teaspoons lemon juice
1 teaspoon ground cinnamon
1/2 teaspoon ground cloves
1 1/2 lbs of a mixture of walnuts and pistachios, finely chopped
1/2 cup sugar
2 teaspoons ground cinnamon
1 teaspoon ground cloves
1 1/2 lbs of phyllo dough, completely thawed
2 sticks of butter, melted
  1. Move your oven rack to the lower middle position and preheat the oven to 300°. Grease a 9x13 in baking dish
  2. Combine the water and 2 cups of the sugar in a large non-stick saucepan and bring to a boil. Reduce to a simmer and add the honey, lemon juice, cinnamon and cloves. Simmer for 15 minutes or until the mixture thickens. Remove from heat and set aside.
  3. In a mixing bowl combine the nuts, sugar, ground cinnamon and cloves and set aside.
  4. Unroll the phyllo dough, set aside 8 layers for the top of the baklava. BUT be sure to keep them layers completely covered with wax paper and rolled up until you need them. Take a layer of dough and brush it will melted butter. Place this in the 9x13 baking sheet. Repeat this 7 more time, until you have a total of 8 layers for the base of your baklava. Remember each piece of phyllo dough must be brushed with melted butter. Cover this phyllo dough base with some of your nut mixture. Cover this with 3 butter sheets of phyllo dough. Continue in this manner until the nut mixture is gone, being sure to end with a layer of nuts. So, BASE, NUTS, 3 PHYLLO LAYERS, NUTS, 3 PHYLLO LAYERS, NUTS, 3 PHYLLO LAYERS, NUTS and stop. On top of that last layer of nuts you will not use those 8 layer of phyllo that you set aside at the beginning. Be sure to brush each on of those layers with melted butter.
  5. Pre-cut the baklava into a diamond shape pattern and bake for 1 1/4 hours or until golden brown. Remove from oven, and pour the syrup mixture over the top. Cool and serve.

Wednesday, March 10, 2010

Rice Cereal Treats

cooking spray
1/4 cup butter
1 package (10-oz) marshmellows (the large kind)
1 teaspoon vanilla
food coloring (optional)
6 1/2 cups cristy rice cereal (any brand will do)
sprinkles (optional)
cookie cutter (optional)
  1. Spray a 13x9 in baking dish with cooking spray
  2. Melt butter and marshmellows over medium-low heat in a large sauce pan, stirring frequently so that you can keep and eye on the melting progress. Remove from heat, add the vanilla, and food coloring (if using). Add the cereal and stir gently until the cereal is well coated.
  3. Spray the back of a wooden spoon with cooking spray and use that spoon to spread your cereal mixture into your prepared dish. Allow to cook completely.
  4. Sprinkle with sugar sprinkles, if desired and cut into your desired shape. As you can tell from my photo above I cut mine into star shapes using a cookie cutter.

Wednesday, January 13, 2010

Pumpkin Cheesecake

Crust
3/4 cup graham crackers crumbs
1/2 cup ginger snap crumbs
2 tablespoons brown sugar
2 tablespoons white sugar
1/4 cup butter, melted
Filling
1 cup sugar, divided
3/4 cup pureed pumpkin (not pumpkin pie filling)
4 egg yolks
1 whole egg
1 1/2 teaspoon ground cinnamon
1/2 teaspoon ground ginger
1/4 teaspoon ground nutmeg
1/4 teaspoon allspice
1/4 teaspoon ground cloves
1/4 teaspoon salt
3-8 oz packages 1/3 less fat cream cheese
2 tablespoons heavy whipping cream
1 tablespoon cornstarch
1/2 teaspoon vanilla extract
1/2 teaspoon lemon extract
  1. Move oven rack to the middle position and preheat oven to 350°. Grease the bottom of your 9 inch springform pan. Check now to be certain that the side latch is firmly in place. Wrap the bottom of your springform pan in aluminum foil if you plan on using a water bath.
  2. Combine the cracker and cookie crumbs, 2 tablespoons white sugar, 2 tablespoons brown sugar and butter together. Mix until well combined. Press firmly and evenly into the prepared springform pan.
  3. Combine 3/4 cup of white sugar, the pumpkin puree, 3 egg yolks, spices, and salt in a medium bowl. Mix until well combined and set aside.
  4. Beat the cream cheese with an mixer (stand or hand) until light and fluffy, about 5-10 minutes. With your mixer going, gradually add the additional 1/4 cup of sugar and mix well. Add the whole egg, the remaining egg yolk and the cream one item at a time and beat until well combined. Add the cornstarch, vanilla and lemon extracts and mix well. Last, add in the pumpkin mixture and mix well until completely combined.
  5. Pour into the prepared pan. If you wish to use a water bath pour some water into a larger baking pan and set your springform pan into that bath of water.
  6. Bake the cheesecake for 1 hour or until golden brown on top.