Showing posts with label tips. Show all posts

Thursday, September 27, 2012

All Hail, the Slow Cooker!

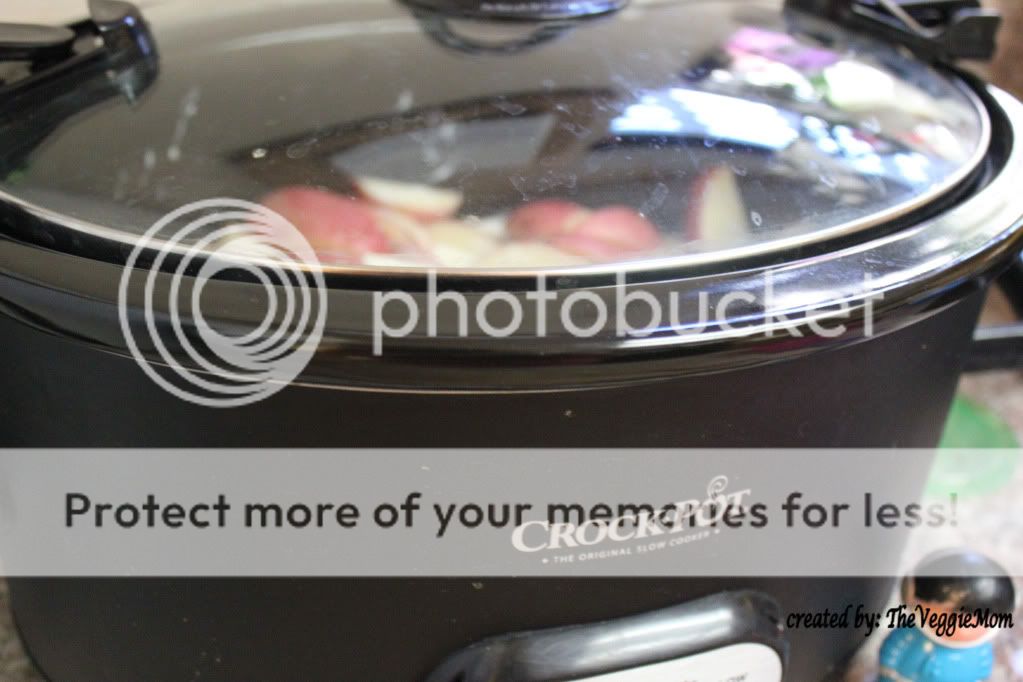
My big Crock-Pot


I have two slow cookers, both the name brand Crock-Pot.  I have the large one photographed above and I have a small one, shown below,  which I use during the holidays for mulling wine or for making larger batches of hot cocoa.

My small Crock-Pot

Crock-pots or slow cookers are most often used during the cooler months but that need not be the case.  I use mine year round.  It does not heat up the kitchen and there are many non-soup/stew recipes out there for the slow cooker.  Here are some good recipe sources:

This gets you recipes straight from the source.  I like this site because it narrows down the recipes by the size Crock-pot/slow cooker that you own.  When it comes to Crock-Pot/Slow Cooker recipes, size matters.  

This blog is devoted to nearly continuous crock potty goodness.  I've made a couple of her recipes and they always work out well.  

Another year long slow cooking blog.  

What?  Self promotion is good for the soul


Wednesday, August 29, 2012

There is more than one way to skin a peach


Step One
Cut a X or cross in the top of the peach (as in the photo above)

Step Two
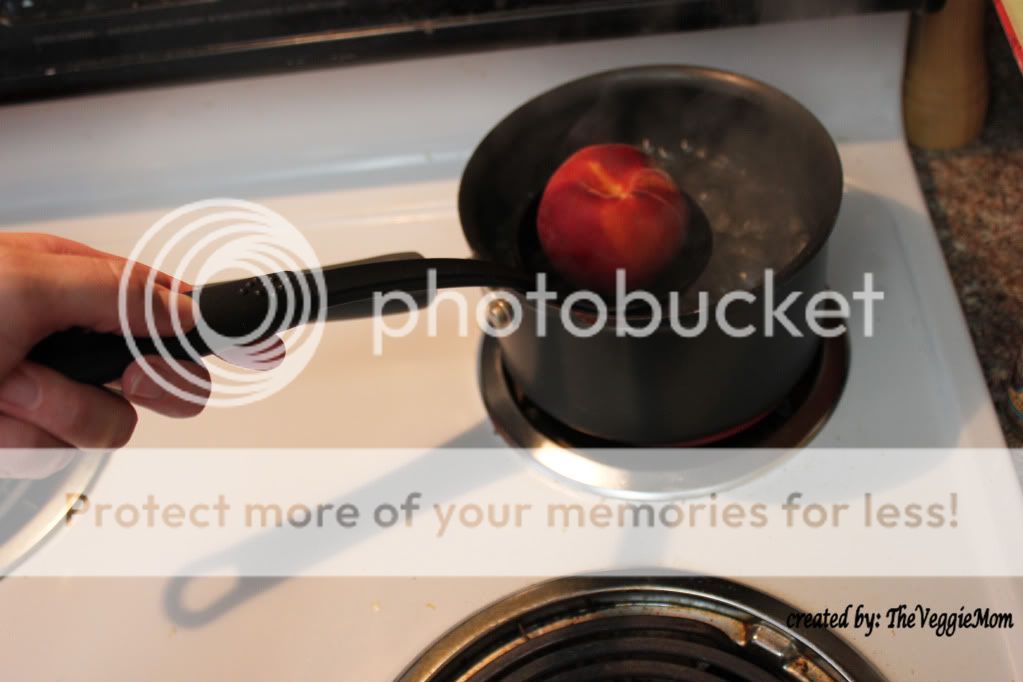
Slowly lower the peach into boiling water, ignoring the screams of the peach, for about 30 seconds

Step Three
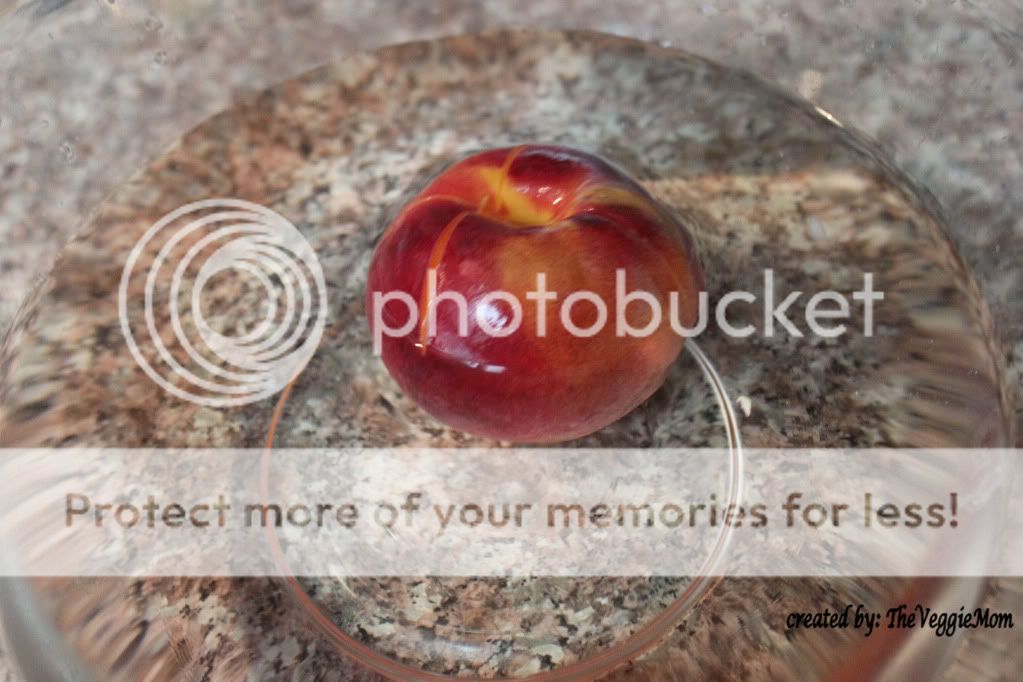
Place the peach in very cold water.  

Step Four
I could not get a photo of this step because I sadly only have two hand. 
Using a paring knife grab the edge of the now loose peach skin and slowly peel it back. 

Friday, March 16, 2012

Getting Out Of A Sticky Situations

Do you ever have a mixing up half full of that 1/2 cup of peanut butter you needed for that recipe you are making.  Or half full of honey or molasses or whatever other sticky substance you might be cooking with.  Well, I've got a helpful tip for you.  

 Spray your measuring cup or spoon with cooking spray.  One quick squirt will do it.  

Pour in your sticky stuff.  

And watch it slide our as easy as can be. 

Thursday, December 8, 2011

Mirepoix: The Trinity of Cooking


A sure fire way to add flavor to a recipe, especially a soup recipe, is to start with a Mirepoix.  A mirepoix is a fancy way to saying onion, carrot and celery.  Regardless of what you call it this practice is a great way to infuse a vegetarian recipe with a ton of flavor. 

I am going to start by showing you best I can how to easily and safely dice the onion, carrot and celery.  You can also purchase these items pre-diced at stores like Trader Joe's, but I highly recommend dicing them your self.  If nothing else the practice will help with your overall knife skills.  First you need a sharp knife and a non-slip cutting board.  I use Pampered Chef cutting boards and I swear by them.  They have rubber around the edges and they do not slip while you are cutting on them. 


Ingredients

onion
carrots
celery


Start by cutting the onion in half, remove the out skin (save it to use later in broth) and cut off the top of the onion where it tapers, but keep the bottom intact so that the onion stays together while you cut it. 


Hold the onion, with you fingers well clear of the blade, and slice the onion horizontally upwards towards what was the bottom of the onion


Again, while keeping your fingers well out of the way, now cut the onion vertically. 


Now cut down into the onion towards the cutting board, leaving a nice diced onion.  Repeat with the other half of the onion if your recipe calls for the entire onion.


Cut the peeled carrots (save the peelings for broth) into strips and then turn and dice


Cut the tops and bottoms of the celery (save for broth), cut the celery into strips and dice. 


Saute the onion, carrots and celery in melted butter or olive oil


Wednesday, September 21, 2011

How to Drain Tofu

Many of my recipes call for extra firm tofu to be drain completely.  This is the best method I have found for draining tofu.  This will allow for the tofu to brown nicely or be breaded.

Remove the tofu from its container, and pat it dry with paper towels. Cut the entire block of tofu as instructed by your recipe. 


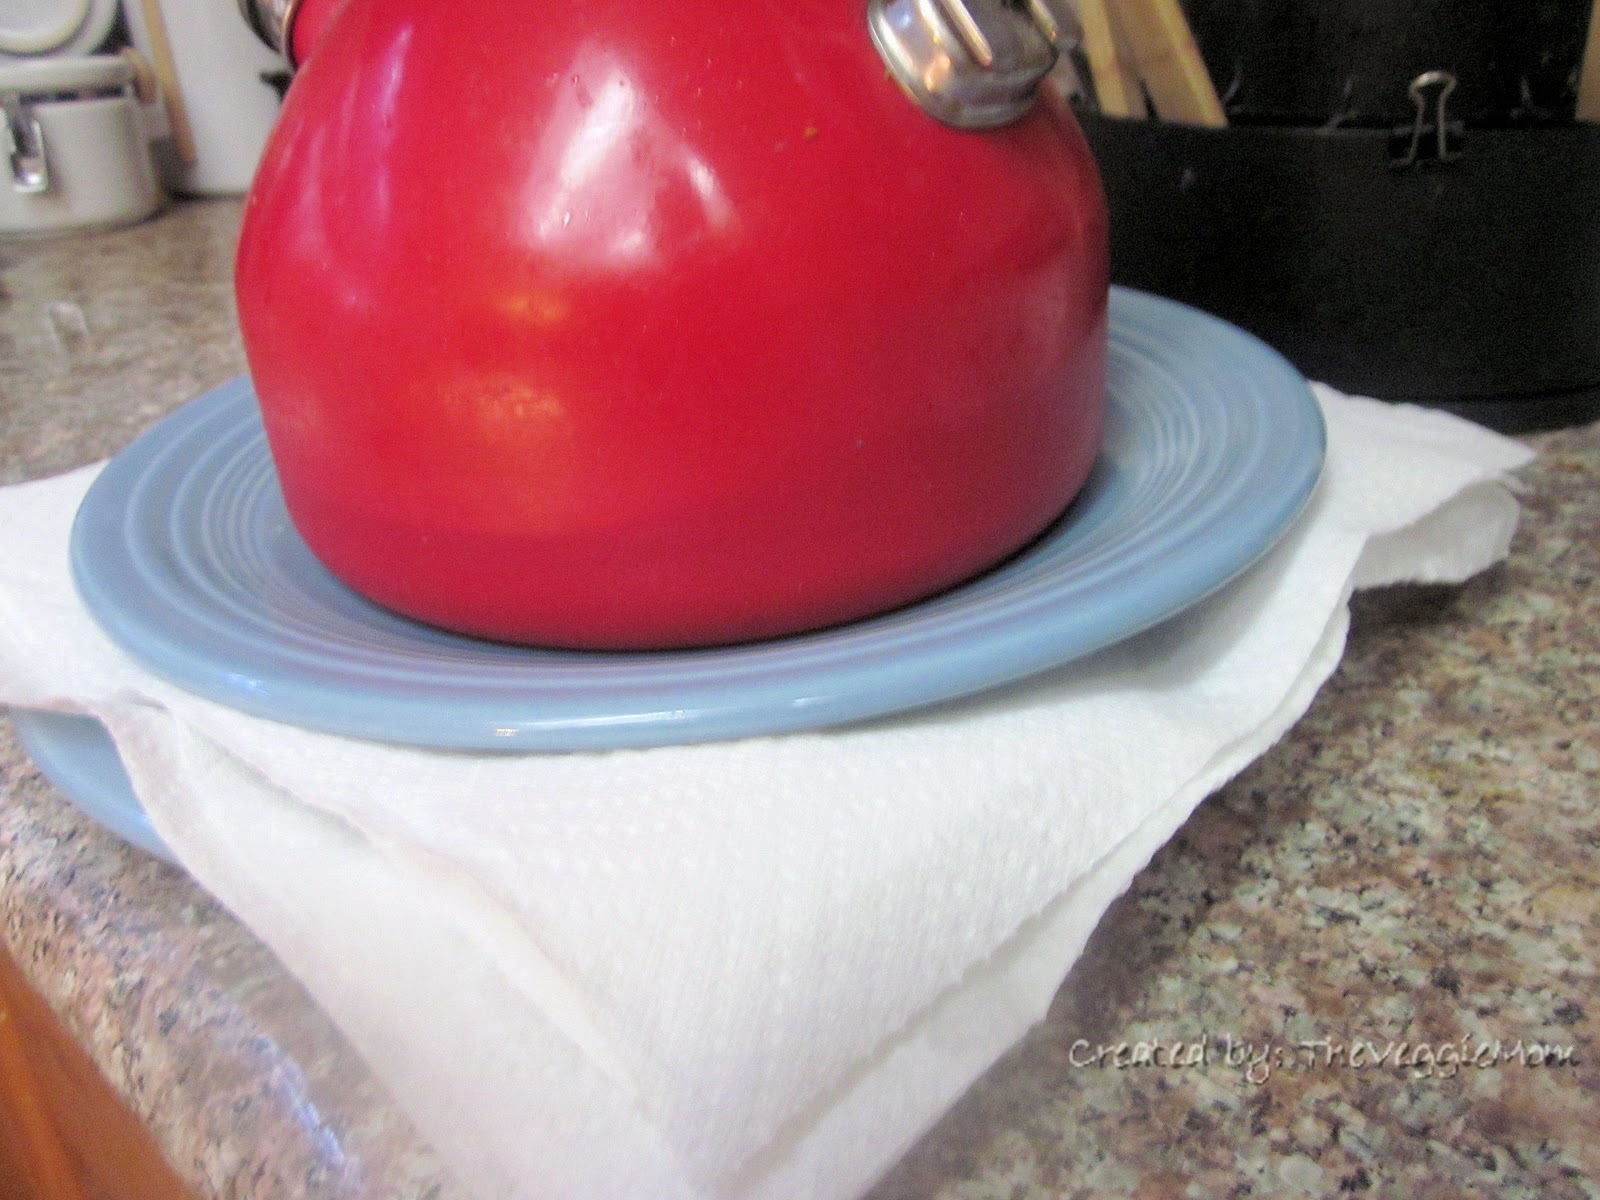
Place several paper towels on a plate, put the tofu on top of the paper towels, top the tofu with several more paper towels. 

Allow the tofu to set under the weighed down plate for at least 30 minutes.  When you see that the paper towels are completely saturated, then swap them out for dry ones. 


Top the paper towel covered tofu with another plate and something heavy to weigh the whole things down.  This will allow your tofu to throughly dry


Thursday, September 8, 2011

Natural Peanut Butter Handling Tip


Many people love the flavor of natural peanut butter, but they cannot stand the way that is separates. You know what I am talking about. That layer of oil that is always on top that you have to mix into the solid peanut butter below. If you don't mix it together properly you either had oily peanut butter or at the end of the jar you have a rock hard peanut butter.

So this is what I do to avoid this issues. I first take the top off the jar and remove the safety seal. Sorry, I did not get a photos of this step.


Then you put the lid back on as tightly as you can and you turn the jar over. Come back later and turn it back right side up. Do this as often as you like. I leave the jar in the area where I prepare most our meal and turn it when I am over there.


Check it every so often until you see a well mixed together peanut butter. This works every time and I love letting gravity do most of the work for me!

Wednesday, August 24, 2011

French Bread Croutons


This is a terrific way to not only add some crunch to soups and salads, but also it gets rid of all those left over bread ends.  For this recipe I used a basic loaf of French Bread that I purchased at my local grocery store. 

Loaf or Partial Loaf of French Bread
3-4 tablespoons of extra virgin olive oil
freshly ground sea salt, as needed to salt the croutons
  1. Preheat the oven to 425 and line a cookie sheet with heavy duty aluminum foil. 
  2. Slice the bread and break up into bite sized pieces. In a large bowl toss the bread with 3-4 tablespoons of the oil and the freshly ground sea salt until well coated. 
  3. Bake for 15-20 minutes or until the bread is toasted. 

Wednesday, May 18, 2011

Hamburger Bun Garlic Bread

Have you ever found yourself with some old hamburger or hot dog buns laying around.  Well turn them into garlic bread! 

hamburger or hot dog buns
unsalted butter
garlic
  1. Preheat the oven to 350 degrees and cover a baking sheet with aluminum foil
  2. Soften the butter and mix it with the garlic. 
  3. Split open the buns and lay them cut side up on the baking sheet.  Spread the butter mixture on the buns and bake until slightly brown on top.  Enjoy!

Thursday, January 20, 2011

Tomato Paste Rescue


There are many recipes which call for 1 tablespoon of tomato paste. One can purchase a tube of tomato paste for upwards of $4 or you can purchase a .99 cent can. In our household the saved $3.01 always wins out, so I am always left with an almost full can of tomato paste. The leftovers never last in the fridge and freezing a whole can makes the second use difficult. Here is what I do. I place the tomato paste in 1 tablespoon serving sizes onto a plate and freeze the dollops right on the plate. Once frozen gently remove the tablespoon size dollops off the plate and place them in a freezer bag. Voila, you have a ready source of tomato paste and you saved some money.

Thursday, January 13, 2011

How to Peel a Tomato

This is probably a pretty well know technique for peeling tomatoes (can also be use for peaches, plums, apricots, etc). But I thought I would offer a little pictorial on how to easily peel a tomato. I need to peel a tomato for a soup and while doing it I decided to photograph the steps. As nice as these photos are, I later realised that I forgot to photograph the soup I was making.


Cut a cross in the top of the tomato. Boil enough water to cover the tomato in a small saucepan.

Pierce the tomato with a large cooking fork and lower it into the boiling water for just a few seconds.
Above you can see how the tomato skin is already peeling away from the fleshy part of the tomato

Allow the tomato to cool for just a moment and then proceed to peel away the skin.


Tuesday, October 26, 2010

My Favorite Vegetarian Products

I wanted to share with you all some of our favorite vegetarian products which can be found in almost any standard grocery store. You may have to look for them, and they are usually near the produce section or in the health food area of your local grocery store. Click on each picture to go to the products website and you should be able to find them in your area. I am not being reimbursed for these products, I am doing this only to serve my readers.

This is Lightlife Smart Ground veggie protein crumbles. Not only have we found the flavor of this product to be the best, we also like that is 12 ounces. It goes a lot further than most protein crumbles which are only 8 ounces.

Tofurky has a line of vegetarian sausages which are nothing short of amazing. They have a great flavor and texture. These are their Kielbasa style.

This is my favorite vegetarian bacon. Now it is never going to fool anyone into thinking this is actual bacon from an actual pig, but it still has a great smokey flavor and a nice texture.


Again another Tofurky product, this is their Italian sausage. I use this in soups and in pasta dishes. In a pinch I toss them on the grill. Again the taste and texture and amazing.


This is a great whole chicken substitute. I use them in a lot of Asian inspired dishes. The flavor and texture is great on these.

Wednesday, May 5, 2010

Cinco de Mayo meal ideas

I thought today I would run a best of sort of post with some good ideas for a Cinco de Mayo celebration. Here is a full meal from start to main course. Click on the photo to go to the recipe. Thanks and Enjoy!

Start your meal with chips, salsa and guacamole

Side dish
Enchilada Suiza Casserole for the Main Course

Tuesday, May 4, 2010

Share a Tip!

We have had some slow food weeks here at Casa de Veggie. Typically the recipes you see here are from the week prior. I will cook, photo and of course serve a meal. Then on Sunday night I sit down and set up a weeks' (Mon-Fri) worth of posts for the following week. Recently I got off schedule because of some cancelled travel plans, and street festivals. Don't ask.

Anyway, this week I thought I would do some other stuff. On occasion I have asked my readers for tips. Especially tips on storing leftover ingredients. This input is invaluable to any home cook, so I thought we could do that today.

Please share your favorite food storage tips in the comment section of this post!

Thursday, April 16, 2009

Gadget and Tip Thursday


My gadget of the week: An Electric Steamer. I mentioned in my Fire Roaster artichoke recipe that I usually steam my artichokes in an electric steamer. Well, that is my gadget of the week. I take my steamer out in the Spring and it sets on my counter clear through to Fall. I steam veggies and fruits in this sucker. It is easy to use and always gives you a delicious finished product. Personally, I love my Oster Steamer, but I am sure that there are plenty of good ones on the market. I love my so much because it has two steaming baskets and a rice cooking basket. You can steam two layers of foods at once.

My tip of the week: For your small kitchen appliances, store your instruction manual in the appliance, if possible. This obviously works best for things like your electric steamer, rice cooker, slow cooker, or pressure cooker. You obviously cannot do this with something flat or with something like a toaster.

Thursday, April 9, 2009

Gadget and Tip Thursday

Thought I would mix things up and throw in some tips and gadget recommendations. Disclaimer time: The gadgets are just my personal favorites. I do not have any affiliation with any manufacturer or retailer. I just love me some good gadgets.

Gadget of the week:
Garlic Press
Seriously, I do not know how anyone lives would out at least two or three of these trusty little items. I have two myself. I just cannot get enough. Greediness aside, when one is in the dish washer you have another one ready to use. My overall favorite is made by Pampered Chef. It is nice and compact, easy to store, it is easy to clean, actually comes with a little cleaning tool and best of all you need not peel the garlic before you put it through the press. This is the best feature, by and far this is why it is my favorite. One possible down side, Pampered Chef products are only available from a Pampered Chef consultant. So, you must either go to or host a Pampered Chef party or order directly from a Pampered Chef consultants website. The usual direst selling extra fees apply. My second garlic press is from Williams Sonoma. It is a bit larger, so takes up some extra room in the drawer; BUT it is larger because it also has a garlic slicing option, which of course comes in very handy. Not only was the two features nice, but you can just pick it up at the mall. Either way, you cannot go wrong. Both are in my opinion great products.


Pampered Chef garlic press


Williams Sonoma garlic press
When picking out a garlic press you should be sure that you can at least hold and touch it before you purchase it. They are not the cheapest kitchen gadgets with prices ranging from $15 to $45. If you are able to attend a Pampered Chef party you should be able to see the press in action and you might even be able to try it yourself. They also do cooking demonstrations at Williams Sonoma stores, so you could get lucky and have an opportunity to see theirs in action as well.

Tip of the Week:
Freezing leftover cooking ingredients
Do not throw away that left over broth! Freeze it. You can pour your leftover broth into an ice cube tray and voile, you have easy to store broth for later use. Just pull out the number of cubed to need (this depends on the size of your trays) and let them defrost in the fridge. You can do the same with leftover sauces or any other liquid leftover ingredients. In my freezer I have frozen cubes of tomato sauce, pizza sauce (defrost later for dipping), chicken and vegetable broth, and coconut milk.

Have you ever made a recipe that called for one tablespoon of tomato paste and then you are left with the rest of the can? You put it in the fridge and it will go bad. So I measure out the remainder of the can onto a plate using my tablespoon measurement, put the plate in the freezer. When the tablespoon sized tomato paste drops are frozen you simply pry them off the plate, drop them into a freezer bag and you are ready to go. You have a bag of already measured tomato paste! Just take them out when you start your recipe and you are good to go.