Showing posts with label pie. Show all posts

Thursday, June 28, 2012

Margarita Ice Box Pie

I have wanted for some time to make a Margarita flavored ice box pie.  I needed a salty base and I did that with the salty Pretzel Crust (see yesterday's post). Next I need the lime, that was no issue, lime juice did the trick.  The lime was sweetened up easily with condensed milk, but then there was the question of the tequila.  I mulled it over some time as to whether or not I should add tequila flavoring or actual tequila.  In the end I went with a small amount tequila.  I figured that it would not be enough to get the kids drunk and I wanted that flavor to add to the overall margarita feel of the pie.

I will be including the calories at the end of the recipe, but please sit down before you look.  No, really.  Sit down.  It's shocking, but in moderation totally doable.  I had this pie a couple of times the week of father's day, and I still lost weight.


The Ingredients


1 pretzel crust
1 14-ounce can of sweetened condense milk
1/2 cup lime juice
2 tablespoons tequila
1 8-ounce package of whipped topping, thawed but kept refrigerated
lime (for pie beautification)

The Tools
stand mixer or electric mixer
spoonula or scraper

The Cooking or Rather the Mixing and Chilling


On a slow speed combine the sweetened condensed milk and lime juice
Add the tequila.  Don't forget to taste the tequila first and after and several hours later.

Gently fold in the whipped topping.  Now, you could use homemade whipped cream in this step.  Just make about 2 cups worth.
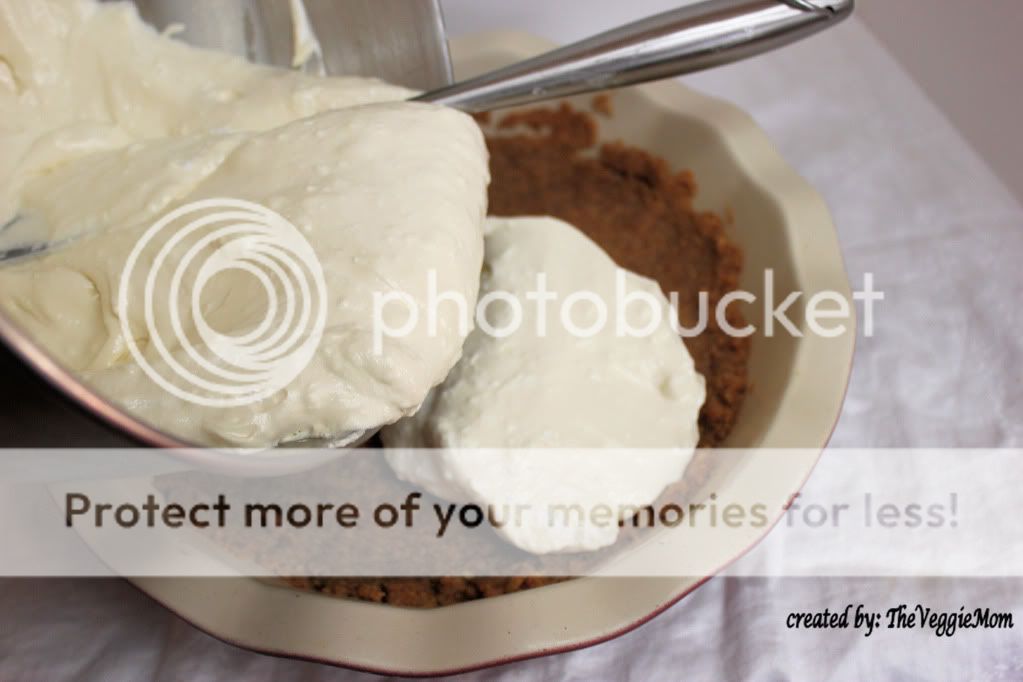
Pour the filling into the crust.  You will notice that the filling is not lime green in color.  I could have added some food coloring to make it green, but I chose not to do so.

Place the pie in the freezer and allow it to freeze/cool for about 2 hours.  Take it out of the freezer about 15 minutes before you cut it.


Recipe source: My Brain


The recipe serves 8 even slices.  Calories are per slice

Calories: 615 (aren't you glad you sat down)
Protein: 8 grams
Fat: 24 grams
Sodium: 971 mg
Fiber: 2
Potassium: 160


Friday, November 18, 2011

The Veggie Mom Place Pumpkin Pie


If you have been reading the blog and you had better have been reading the blog, you know that all the Veggie Boys wanted to do when their dad was out of town was to go to the Pie Place.  Not wanting to spend a fortune on pie and pancakes(the pie place is a pie/other food place) their smart momma, made both pie and pancakes while the Veggie Dad was out of town.  Luckily I had all the ingredients on hand for a pumpkin pie and thus I made a pumpkin pie. 

Normally, I would do a basic pumpkin pie recipe with pumpkin puree, evaporated milk., spices and sugar.  But this time I decided to skip the evaporated milk and go with a cream/milk mixture.  Of course it had been made clear to me that whipped cream MUST be served with pumpkin pie, so since I'm gonna buy cream anyway I might was well use it in the pie, right?  A game time decision was using dark brown sugar and in all honesty, while I liked the flavor I did not like that the dark brown sugar made the pie more brown then pumpkin-y orange. 


Pumpkin Pie

1 single pie crust pre-baked, warm and fitted into a 9-inch pie plate
1 15-ounce can pumpkin puree
1 cup packed dark brown sugar
2 teaspoons cinnamon
1 teaspoon ginger
1/2 teaspoon nutmeg
1/2 teaspoon salt
1/4 teaspoon ground cloves
2/3 cup heavy cream
2/3 cup whole milk
4 large eggs


Pre-bake the crust according to the instruction in the Single Pie Crust recipe through the baking (of course), but be sure that pie crust is warm when you put the pie filling into the crust. 

For baking the filled pie, preheat the oven to 400 degrees. 


Process the pumpkin puree, brown sugar, cinnamon, ginger, nutmeg, salt, and cloves together in the food processor until well combined, about 1 minute. 


Transfer the pumpkin mixture into a sauce pan and simmer over medium heat, stirring constantly, until thick and shiny, about 5 minutes. 


Slowly, whisk the cream and milk into the pumpkin mixture and return to a simmer briefly and then remove from the heat.


Process the eggs in a food processor until it's all yellow and uniform in color, about 5 seconds


With the machine still running, slowly and carefully add (like maybe don't try and take a photo of what you are doing it while you are doing it) the pumpkin mixture to the eggs through the feed tube.  Process until well combined, about 30 seconds. 

Immediately pour the warm filling into the warm pie crust (sorry I failed to get a photos of this step).  Bake the pie until the filling is puffed up, lightly cracked around the edges and the center giggles slightly when shaken, about 25 minutes.  If you feel the edges of the crust needs it place a crust guard or some aluminum foil around the edges towards the end of the baking time. 

Let the pie cool for 2 hours. Be sure to take a photo of the pie before you leave it alone with your pie-crazed children, because one of them will try and eat the cooling pie with a large spatula when you back is turned.! Serve warm and covered with whipped topping to hide any and all of it's battle scars. 


Wednesday, November 16, 2011

Single Pie Crust


My husband was recently out of town on business.  Normally his trips are a Monday through Friday affair and with little exception things run smoothly in his absence.  This trip, however was a bit more extensive with him leaving on a Friday and returning the following Saturday.  Initially this did not seem daunting until it dawned on me that I would have to entertain my children for two whole days without the assistance of husband, school, or extra-curricular activities.  In speaking my boys it became abundantly clear that they wanted to do only one thing: Go to the pie place.  The pie place is a restaurant here in town called Shari's (this may be a chain-not sure), and going to the pie place involves getting more than just pie. It involves, pie and happy faced pancakes.  Sadly given the long week ahead of us this was financially not an option.  Being the clever mommy that I am I decided to make a pie.  Fortuitously I had all the ingredients on hand for a pumpkin pie.  I will post the recipe for the pumpkin pie in a few days, but first I wanted to talk about crust. 

People are I think unnecessarily frightened of making their own pie crust, but it really is quite easy.  The keys to a good pie crust is to just chill.  Chill your butter, chill your shortening and chill your water.  Overall, just chill out.  So what if it does not look perfect, most of it will be under your pie and that little bit that exposed to the eye will soon be eaten!  So, don't sweat it...just chill.

I have posted a Single Pie Crust in the past and yes, it is the same recipe, but this time I have pictures of the step by step process of making the pie crust. Of course as I sit down to create this post I am suddenly aware that I neglected to take a photo of the baked empty pie crust.  Sigh, I will get this multi photo thing eventually.  Instead above you can see the pre-baked version.  You will have to wait until I post the finished pumpkin pie to catch a glimpse of the baked crust. 


Single Pie Crust
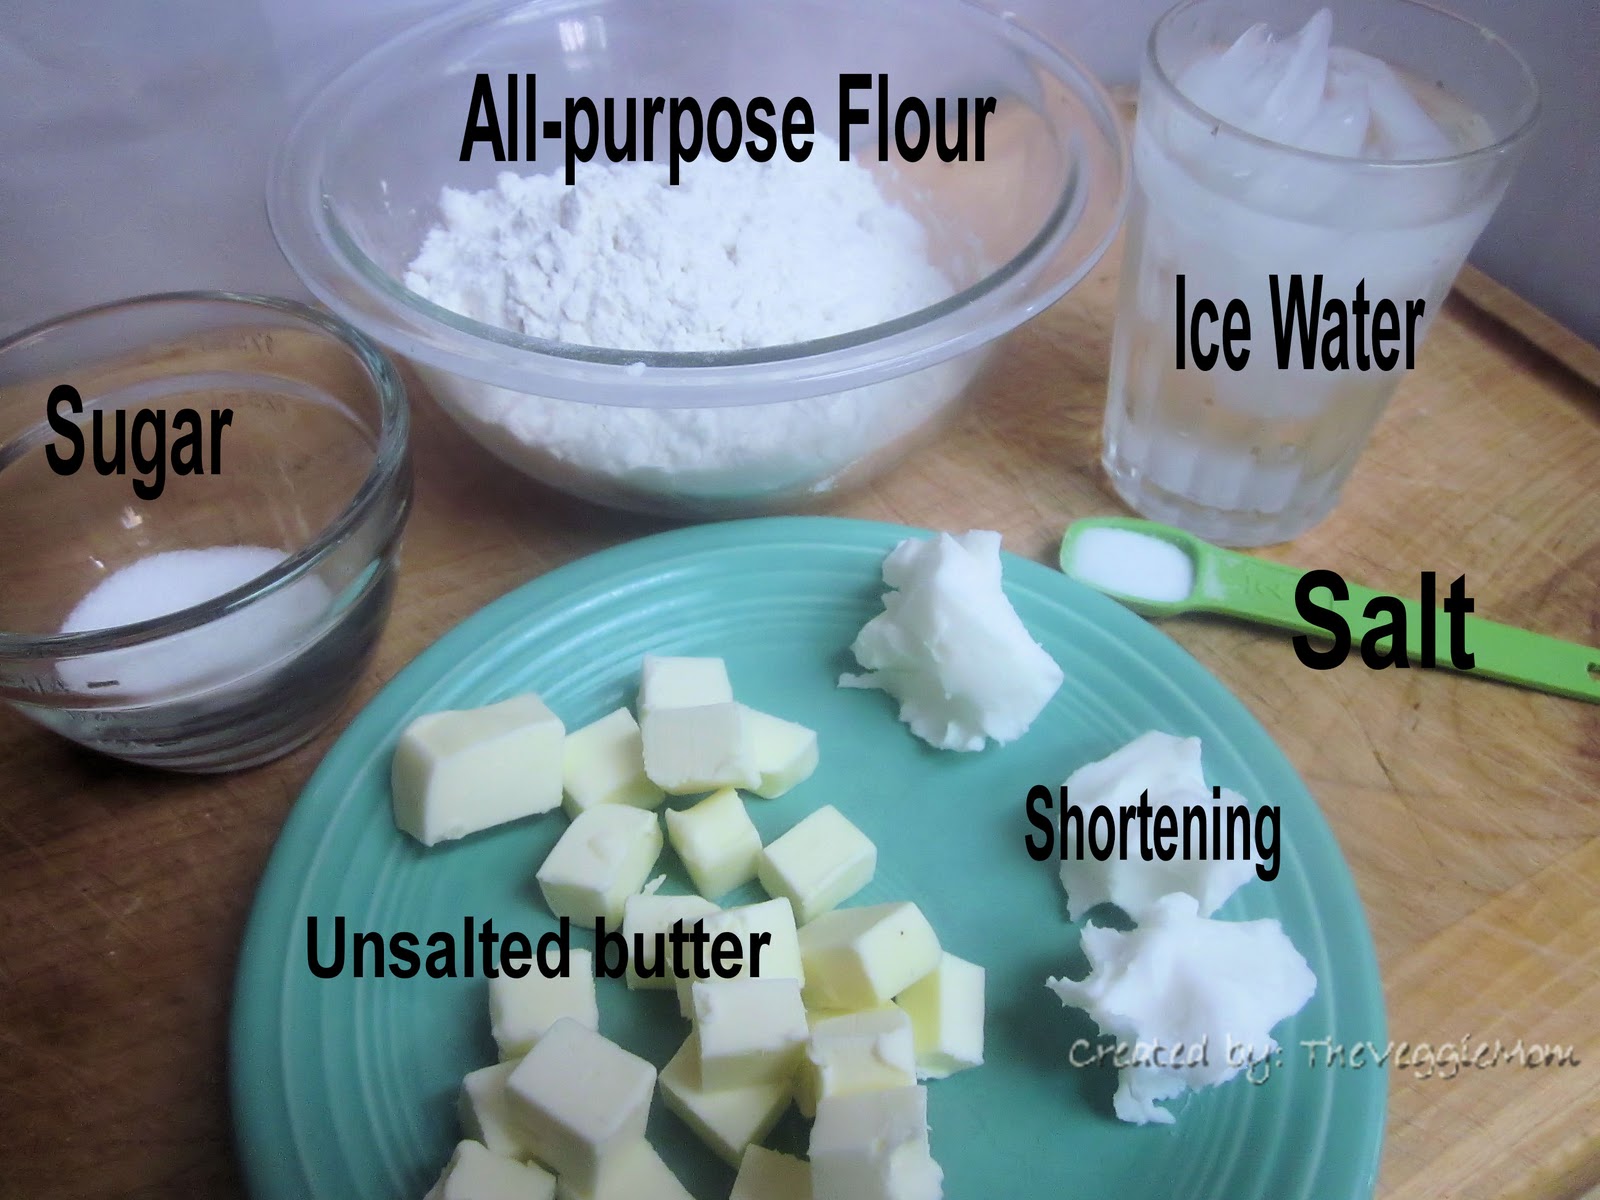
1 1/4 cups all-purpose flour
1 tablespoon sugar
1/2 teaspoon salt
3 tablespoons vegetable shortening, cut or pinched into small pieces and chilled
5 tablespoons unsalted butter, cut into small pieces and chilled
4-6 tablespoons ice water

Flour mixture processed with shortening and butter: should resemble coarse crumbles

Process the flour, sugar, and salt together in a food processor until combined.  Scatter the shortening over the top and process until the mixture resembles coarse cornmeal.  Scatter the pieces of butter piece over the top and pulse the mixture until it resembles coarse crumbs.  Transfer the mixture to a medium bowl.


Sprinkle 4 tablespoons of ice water over the mixture.


Stir and press the the dough together with a stiff rubber spatula, until the dough sticks together.  If the dough does not come together, stir in the remaining water, 1 tablespoon at at time, until it does. 


Turn the dough out onto a piece of plastic wrap and flatten into a 4-inch disk.


Wrap the dough tightly in the plastic wrap and refrigerate for about 1 hour.  Before rolling out the dough you can let it sit on the counter to soften up.  I prefer the dough to be well chilled when I roll it out. 


Roll the dough out into at least a 12 inch circle.  I usually end up rolling the dough out to a circle a little larger than 12 inches in diameter.  This is where taking photos of the cooking process became extra hard.  Firstly, where I roll out my dough is an extremely poorly lite area of my kitchen.  Secondly, you need two hands to roll out dough and one hand to hold a camera.  I am sadly one hand short, but I did my best. 


Pick you the rolled out dough my rolling it onto the rolling pin.  Then unroll the dough onto/into the pie plate.  Gently push the dough down into the pie plate, and trim over any extreme excess. 


Fold over the edges of the pie dough and crimp or pinch the edges to make it all beautimous.  At this point you need to determine if you are going to need to pre-bake you pie crust before putting your filling into it.  Your pie recipe will instruct you on whether of not your need to do so. In general pre-baking helps to assure that your pie crust does not get too soggy when you back the entire pie. Before you bake the pie, cover it with aluminum foil and place it in the freezer until it is firm to the touch, about 30 minutes.


Remove the pie crust from the freezer and it is ready to use.  If you are pre-baking the pie crust first move your oven rack to the lower middle position and preheat your oven to 375 degrees.  Pierce the pie crust with a fork and re-cover it with the double layer of aluminum foil, and fill it with pie weights.  I recently purchased the pie weights pictured above at Sur le Table, but you can get them elsewhere.  If you do not have pie weights, you can use dry beans or dry rice in place of the pie weights. If you do use beans or rice you will need to cover the beans and rice with another layer of foil and you will be unable to use the beans and rice as food.  You need not cover the pie weights.  

Bake the crust for 25 to 30 minutes or until the crust is dry and light in color.  Transfer the pie crust to a wire rack and remove the weights and foil.  Fill the pie and bake according to the pie recipe. 

Wednesday, September 14, 2011

Single-Crust Pie Dough

This photo may be a bit deceiving, but I promise the pie crust is under all that quichey delicious goodness.  The quiche recipe will run tomorrow, until then you need to know how to make a pie crust.  Pie crusts can be intimidating, but it really not all that hard.  Remember that most of the work is going to be hidden by the filling so don't panic if the crust is not perfect. For me the most important part of getting a pie crust right is chilling the shortening and butter.  I chill mine in the fridge for at least a half and hour before use and I only take it out as I use it.  For the water, I but about 1/2 of water into a measuring cup and put that into the freezer.  This allows me to spoon out what I need and the water stays nice and cold. 

This crust can be used for any topless pie, or for a quiche .Some pie or quiche recipes will call for a warm or pre-baked pie crust. I will tell you how to do this in this recipe, however only do this step if you pie recipe call for a pre-baked crust or if the recipe uses the term: blind baking.

This recipe also calls for the use of pie weights.  You can purchase pie weighs at any kitchen gadget store, or you can use dried beans or rice.  I use a combination of dried beans and instant rice.  I cover them with another layer of foil to keep them from burning. You cannot use the beans or rice of cooking after they have been used as pie weights.  I keep mine in a ziploc bag marked pie weights, so that I can keep them separate from other dried beans. 

1 1/4 cups all purpose flour, plus for for rolling out the dough
1 tablespoon sugar
1/2 teaspoon salt
3 tablespoons vegetable shortening, cut into small pieces and chilled
4 tablespoons unsalted butter cut into small pieces and chilled
4 to 6 tablespoons ice cold water
  1. Process the flour, sugar and salt in a food processor until combined.  Scatter the shortening over the top and continue to process until mixture has the texture of coarse sand, about 10 seconds.  Scatter the butter pieces over the top, and pulse about 10 times until well combined.  Transfer to a bowl.
  2. Sprinkle with 4 tablespoons of the ice cold water over the flour/butter/shortening mixture.  Using the back of a spoon or a very stiff spatula press the dough against the side of the bowl until it all comes together and begins to resemble a dough.  If the dough does not come together, add the remaining water, 1 tablespoon at a time.  Form the dough into a 4 inch disk, wrap it in saren wrap and chill it for at least 1 hour. 
  3. Let the chilled dough soften slightly at room temperature before rolling it out in a 12-inch circle and fitting it into a pie plate.  Trim, fold and crimp the edges and freeze the unbaked pie crust until firm, about 30 minutes, before filling it or baking it.  Your pie recipe will specify if the crust needs to be prebaked, but the recipe may also use the term blind baking. 
  4. If you are pre-baking your pie crust, adjust the oven rack to the lower middle position and heat the oven to 375 degrees.  Double line the chilled crust with heavy duty aluminum foil making sure of cover the sides of the crust with foil and fill with pie weights.  Bake until the pie dough looks dry and is light in color, about 25 to 30 minutes.  For a partially baked pie crust, remove the crust to a baking rack, remove the pie weights and foil and continue with your pie recipe.  For a fully baked crust, remove the pie weights and foil and continue baking for an additional 12 minutes. 
  5. The crust may be cooled or used immediately.